
Molnar Technologies Connecting Rods Torque Specs and Installation Instructions
![]()
FAILING TO FOLLOW THESE INSTRUCTIONS CAN RESULT IN ENGINE FAILURE
Use caution to avoid getting rod caps mixed up. The rod cap and tower are a matched set and must not be installed on the wrong rod. DO NOT USE METAL STAMPS TO MARK RODS. Using metal stamps can distort the big end bore resulting in bearing clearance problems that may cause engine failure.
CLEARANCES: Clearances are controlled by the bearing shells, not by housing bore diameter of the connecting rod. If your oil clearance is not correct, use bearing shells that provide the proper clearance. Due to manufacturing tolerances, housing bores (both in the block and the rods), crankshaft bearing journals, bearing shell thickness and bearing crush, clearances must be checked to insure there is proper oil clearance. It is the responsibility of the person assembling the engine to make sure oil clearance is correct.
Do not modify the housing bore size to gain more clearance. We do not recommend the use of Plastigage for checking bearing clearance. Using a bore gage and micrometer is the proper way to measure bearing clearance. Normally, .001” per inch of crankshaft diameter is recommended when measured at the crown of the bearing. This means a crankshaft with a rod pin diameter of 2.100" should have a minimum of .0021" of oil clearance
TIGHTENING: Connecting rod bolts are the most highly stressed fasteners in a race engine and must be tightened properly for them to do their job.
ASSEMBLY: Lubricate the threads and under head of the bolt with the lube provided by Molnar Technologies. If you need more lubricant the Molnar recommended bolt lube is CMD brand Extreme Pressure Lube #3. Do not use Loctite, oil or Moly lube on bolts. NEVER INSTALL BOLTS WITHOUT LUBE.
Clean rods thoroughly to remove all dirt and foreign oils. Apply the supplied bolt lube on threads and under head of bolt and tighten per instructions below.
Bolts are like very stiff springs. Stretching them the proper amount provides the clamp load that is required to keep the parts bolted together. Torque does not measure clamp load, it measures friction . The stretch method or the torque and angle methods are a much more accurate method for tightening rod bolts.
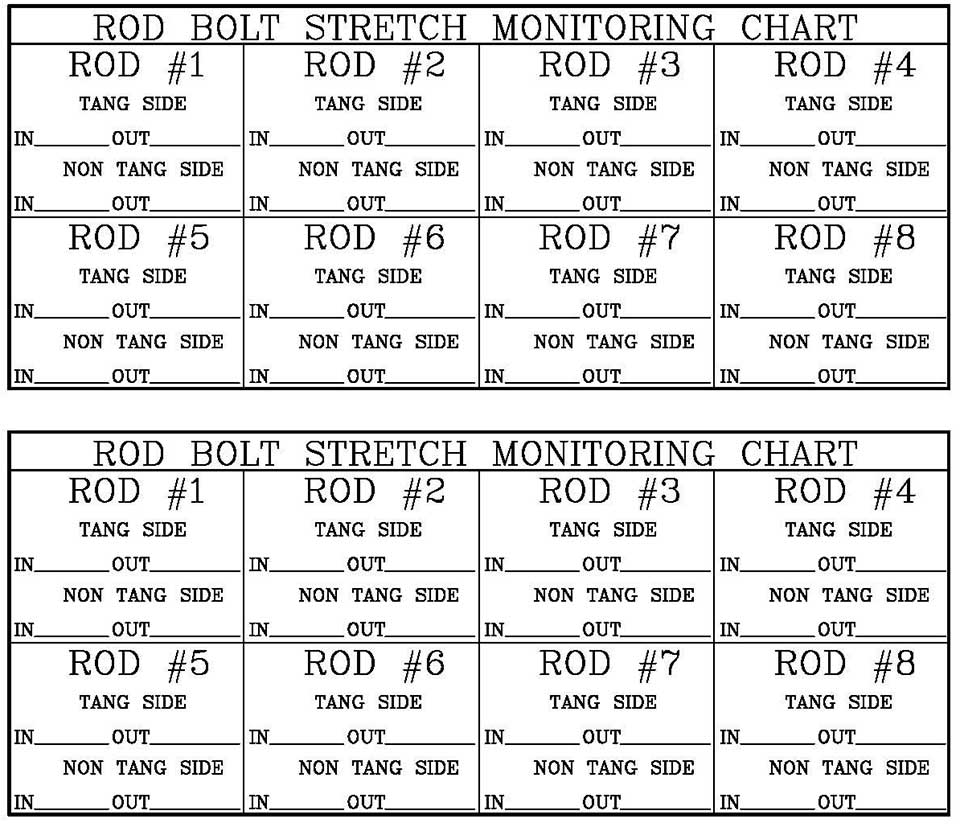
To use the stretch method, measure and note the free length of each bolt before tightening with a stretch gauge or a micrometer with ball end attachments. Then, using the chart below, tighten the bolt until the proper stretch is achieved. Use the rod bolt log on the back of this page to record the free length of your bolts.
To use the torque and angle method, simply torque the bolts the amount listed in the chart below then, using a Snap-On #TA360 torque angle gauge, turn the bolt the listed number of degrees.
| Bolt Type | Head Stamp | Recommended Stretch | Torque & Angle |
|---|---|---|---|
| 3/8 X 1.500” Under Head Length | MOLNAR ARP 2000 | .0055” to .0059” | 25 ft lbs + 55 Deg |
| 3/8 X 1.600” Under Head Length | MOLNAR ARP 2000 | .0056” to .0060” | 25 ft lbs + 55 Deg |
| 7/16 X 1.400” Under Head Length | MOLNAR ARP 2000 | .0048” to .0053” | 30 ft lbs + 40 Deg |
| 7/16 X 1.600” Under Head Length | MOLNAR ARP 2000 | .0060” to .0064” | 30 ft lbs + 60 Deg |
| 7/16 X 1.800” Under Head Length | MOLNAR ARP 2000 | .0070” to .0075” | 30 ft lbs + 65 Deg |
 Item added to cart
 copyright © Motorsports Parts Corporation T/A Campbell Enterprises. All rights reserved